Summer has come to an end and the kiddos are back in school. Only a few more days of Row by Row and it too will end for the year. We are so appreciative of every customer that walks through our door, follows us on social media or visits our website. Without each of you we would not be here! We hope to be here a very long time!
NEW HOURS – Effective September 7th our new hours will be:
Monday – Saturday 10:00 am – 4:00 pm
Sunday 1:00 – 3 4:00 pm
If you are traveling and think you might not make it prior to closing – just give us a call and if we are able to stay open we will! You don’t know; if you don’t ask!
To stay up to date with our goings ons – we encourage you to follow our blog -or- follow us on Facebook -or- follow us on Instagram.
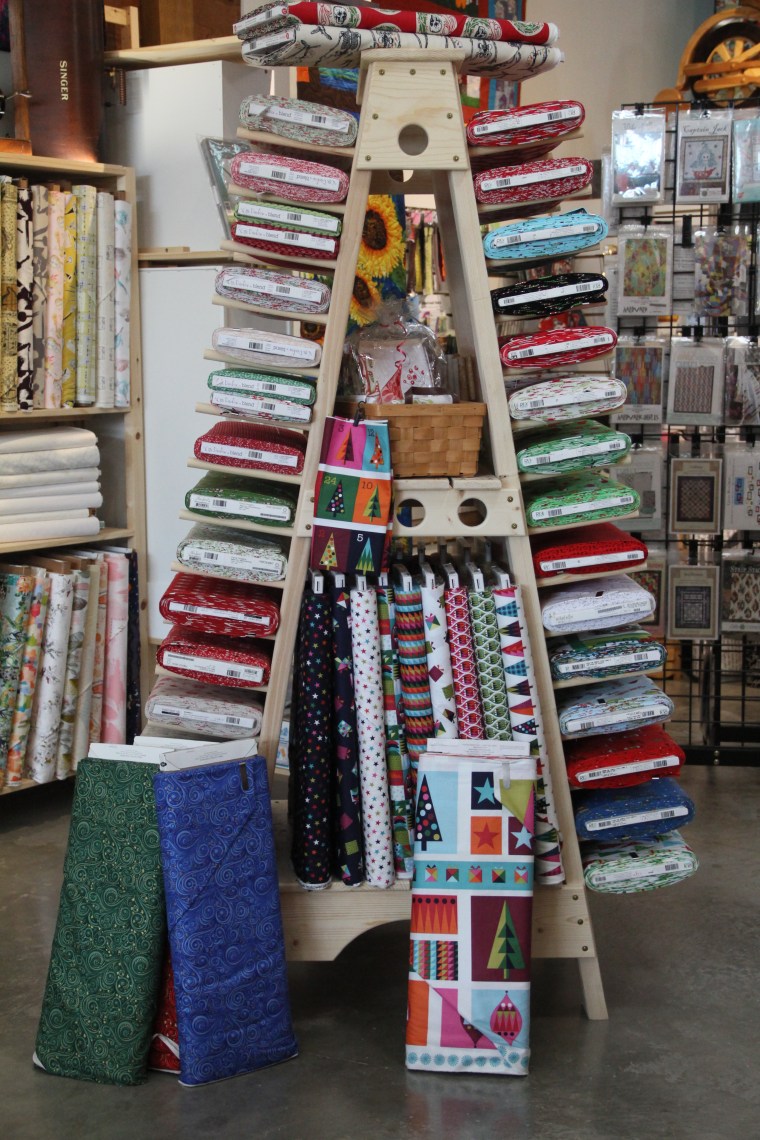
We have doubled our fabric since we opened and we have more arriving almost daily!
Some of our favorite collections……
Looking for some quick Christmas gifts? We have a variety of panels to choose from…..
And we have kits galore! Here are just a few……
Classes and Events!
Below is a list of our upcoming classes and events…..
Retreats
I hope you enjoy all of this information. Your feedback is appreciated!
Going to Pieces here in Luling TX!
Denise, Lindsey, Corey and Holly (and sometimes Aunt Tara!)
Good Morning! I was searching through my blog the other day for something and realized I really miss blogging and sharing (in more depth) what I am up to these days! SEW – from now on I will be blogging more frequently to let you know what I am working, what we have new in the shop, where I am teaching etc.
First of all – thank you to all that have stopped by the shop since we opened – we are grateful. In our effort to show our gratitude we have a monthly give-a-way! July we gave away this quilt! Fear not – I have a pattern available if you did not win but would still like to have this festive quilt to show your love for the USA!
I also want to share this adorable quilt with you – the fabrics are by Cori Dantini – my new favorite fabric designer! My granddaughter is part of an acting ensemble and her very first play was “Into the Woods” and she played the granny – so of course I had to buy this fabric collection! We have this wonderful kit available for you! Call us for more information!
I have been asked to help Quiltworx complete a quilt for the new technique of the month – Vintage Rose! The color way is designed by Judel and the fabrics are from Island Batik!
Here is what I have done so far – be sure to “follow” the blog to stay up to date!
You can also keep up to date with our shenanigans on Facebook and Instagram – both under HollyDee Quilts!
One of my students made this beautiful Mariner’s Compass; then I was asked to quilt it! She patiently waited for this quilt to move up the list of quilts to be quilted! I sent her a couple of sneak peek photos once it was loaded. But this did not prepare her for what she would receive – upon receipt of the quilt and shams her note to me said simply “It Came! It takes my breath away!” Another happy client! Her quilt was so stunning to begin with – the choice of classic colors made this an amazing quilt to start with. She had sent me a pieced back originally. Then it was determined she would need to send me a different back; I must say I was so excited to use the new backing as I knew the quilting would be stand out!
This is my first attempt with a tutorial. I welcome constructive feedback. I am not a technical writer and my chosen style is to try to put it in words how I would verbally teach it. So “listen” to my words as much or more than you “read” them.
The pattern I have chosen is “Paddlewheel” by Judy Niemeyer Quilting. Judy’s company, Quiltworx was recently highlighted in 2 major quilting magazines and this pattern was included as part of articles.
I am a certified Judy Niemeyer instructor and love teaching her patterns and techniques at quilt shops and guilds across the country (and beyond with a quilters cruise in May!)
There are some tools that are recommended for our techniques.
Before we can begin you need to cut out your papers! Quiltworx prints these on newsprint for us making it easier to remove the papers at the end! When trimming papers, be sure to leave at least 1/8″ all the way around the pieces.
Now let’s begin!
Here is my Paddlewheel quilt – there is a contest going until April – if you use fabrics from the “Reclaimed West” collection you are eligible!
Today’s post is for the “Goose” block!
(I will do the other block and assembly tomorrow)
This is the quilt we are making! My sample block is the one in the lower left corner.Here is our pattern and some of the fabrics I get to choose from!
The pattern is written for the cream and blue in the upper left in the above photo! I have chosen different fabrics for mine and made notes on my pattern which colors replace which fabrics!
Once we have our fabrics chosen we are ready to cut out the pieces. Quiltworx patterns take the guess-work out of cutting the pieces for paper-piecing. We will be using “Template Layout Sheets” These are simply pre-printed papers that tell you exactly where to cut your fabric. They are clearly labeled as you cut so there is no guess-work when you get ready to sew.
There are helpful notes on the template layout sheets – this one requires 10″ squares and all fabrics to be stacked right side upThis is the “Template Layout Sheet” It is used to cut your fabrics the proper shape and size for paper-piecing!I don’t have to have EXACTLY 10″ – I need approximately 10″ If I was using a “pre-cut” there would be not measuring or trimming. I am using yardage generously donated by Timeless Treasures Fabrics so I have some cutting to do.I use the template layout sheet to determine what size to cut my fabric – no measuring!And I will also trim off this excess fabric – just close to the outside line! Then I begin to place large paper-clips on each piece I will be cutting out. This will secure the paper with all the good information to the fabric pieces!The template layout sheet is numbered for the order to cut each line. Here I am cutting line 1, then line 2 etc. I use my Add-A-Quarter ruler as it stands over the paper-clips and will not slip as easily. (In the photo I have not added all of the clips yet)All the pieces are cut in the 1st stack. To the right is the 2nd stack as I need 2 stacks to make this quilt. (In this photo you can see the placement for the paper-clips)Here are both stacks cut – the stack on the right has BLUE on top, the left stack BLACK. (I am going to trade the BLUE triangles with the BLACK triangles)Here I have traded the geese (triangle shape) between the left stack and the right stack. (See the blue poking out on the right side? With the BLACK geese)Once I have “swapped” the geese I line up the pieces by section #. Section 1 is on the left and section 10 is on the right. All of the pieces (except section 1) have the words SEW SIDE on them, you want these to all point the same direction, in this photo all SEW SIDEs are to the right!Prior to starting the next step it is recommended that you place your sewing paper on a light box (or window) upside down, trace the DASHED lines on to the back of the paper. (If you are experienced with paper piecing this step may be skipped.Now this is section 1. (please pretend it is black fabric, I forgot to take a photo of this step with black fabric. TURN the section one fabrics upside down so you are looking at the WRONG side of the fabric.Using a water soluble glue – glue the WRONG side of section 1 to the WRONG side of the paper. You will see your traced lines to aid you in fabric placement. (once again pretend this fabric is black!)Now place your folding template (template plastic 3″ by 12″) on SOLID line 1 as shown in photo (see now it is black fabric!)Fold the paper back (solid line one)Place your add-a-quarter ruler against the folded paperUsed your rotary cutter and trimming away the excess fabric, leaving your 1/4″ seam allowanceNow to add section 2. You ALWAYS want to place this so the words “sew side” are away from you. This makes lining this piece up a breeze! (No dashed lines on this piece in a couple of photos you will see WHY the dashed lines are nice)Here I am pulling the 1st fabric off the stack (right side up) (Still no dashed lines)and sliding it under section one, where we just trimmed using our add-a-quarter ruler. I have placed the paper here only for your reference. The piece of red fabric is UNDER the black piece. The fabrics are “Right Sides Together” SEE THE DASHED LINES? For the purpose of this tutorial I am showing the pertinent dashed lines, you would have all your dashed lines showing.
WE are ready to sew now. Set your stitch length to 1.5-1.7, use a size 70 microtex sharp needle and a sewing foot without the little 1/4″ ledge. WHY a size 70 you ask? Each time we take a stitch we push fiber dust and a little bit of paper into our machine, with a 70 sharp we will push a lot less trash into our bobbin area!)
Now I am at my sewing machine, I have placed my presser foot on solid line 1 and I will sew all the way along the solid line, including the seam allowances. (See the red fabric poking out?)After I have sewed this is what it looks like and I am ready to press.And here I have pressed. Don’t worry that the edges are not even, these will be trimmed as we progress through the block.Before I can trim to add the next piece, I need to gently pull the paper away from the sewn line in the seam allowance.Another view of how I gently pull the fabric from the seam allowance so I will be able to fold and trimNotice I pulled it way back from the edge, this will allow all the straggly threads to be trimmed as I progress.Take your folding template and fold on SOLID line 2Use your add-a-quarter ruler and trim away the excess fabric. You should have some of each fabric to trim away. If not you may not have placed your 2nd piece of fabric properly.Now I am ready to add section 3. (Notice the sew side is away from me)I pull the top piece of fabric off the stackPlace it under the area I marked off when I traced the dashed lines. Now I will go to my machine and sew on SOLID line 2My line is sewn and I am ready to pressAnd I have pressedThis photo allows you to clearly see where I started and stopped my sewing!And this photo shows you where I gently pulled the paper back from the stitches so I will be able to “fold & trim”I place my folding template on SOLID line 3 and fold back the paper.I use my add-a-quarter ruler and trim away the excess fabric.The excess fabric after trimming.With my sew side away from me – I pull the top fabric off the stack of SECTION 4 fabrics
This photo shows you where you should see your fabric “under” the paper to know you have placed it properly.This is AFTER I have sewn section 4 – see next photo….Notice now that I have pressed, you cannot see any of my notes – that tells me that I have placed my fabric properlyHere I have gently pulled the paper back from my stitches. Don’t worry if the paper tears a little extra bit, that just makes it easier to pull off later!Place your folding template on SOLID line 4 and fold.Used your add a quarter ruler and trim the excess. If you have nothing to trim OR a LOT to trim – stop and check before trimming!See the red fabric – I have already placed SECTION 5 under my trimmed piece.OOPS! See the traced line? That means that I did not place SECTION 5 properly (the red triangle). I need to un-sew this and scoot it over and re-sewSee how far to the left that red fabric is? That is why it did not line up properly!See the little red corners on the left and right? Much better!Now when I press I have covered my traced lines!Gently pull back the paper and trim on SOLID line 5.
Now we are to LATHER, RINSE, REPEAT stage – just keep on with what you have been doing. Only instead of lather, rinse, repeat – you have a couple of choices of acronyms
TSP (teaspoon) – stands for TRIM, SEW, PRESS (I believe Carol Doak coined this acronym.
SIFT – Sew, Iron, Fold, Trim – I am not sure the origin of this acronym, it was shared by one of my students.
Once all 10 pieces of fabric have been added you are ready for the next steps!
Here is our little block all finished upHere is the back side – it is time to CAREFULLY trim the edges.Because we left at least an 1/8″ all the way around the block we can clearly see where to trim on the OUTER line!I like to use my add-a-quarter ruler because I can line up the “1/4” on the inside line as a double check!Here I have carefully trimmed all the sidesIsn’t it pretty?
Now that you have made one block, I encourage you to “chain-piece” the remaining blocks. This will speed up the process A LOT!!! I love chain-piecing!
For chain-piecing I will glue all the SECTION 1’s in place, Fold and Trim all Line 1’s and now I am ready to add the 2nd piece of fabric and sew
I hope you have enjoyed this tutorial and look forward to you joining me for tomorrow’s post as well!
I am so excited to be a vendor with the Coastal Prairie Quilt Guild this weekend. Today was setup day and with a lot of help from my mentors, Cynthia England and Ivy – I think we did them proud. When Cynthia found out I would be vending a few months ago she immediately offered the use of some of her metal panels to use in the booth. Ivy took over from there and found pieces and parts that might be helpful to me in setting up my first booth. She also checked to be sure I had the proper items in my toolbox.
My trusty side-kick Marilynn had offered to help with the show and setup – she and I are so compatible! She has been helping me in the quilting room for several years and we just get along!
Well here are a few photos of the booth – let me know what you think! If you stop by the show at the Stafford Center be sure to say HI! Also – check out the quilts in the show with quilting by Karen Shively – AWESOME!!! There are several other awesome quilters represented in this show and you will also get to see a few Judy Niemeyer Quilts, some of which even have ribbons! Maybe I will get some time to photograph those over the next 2 days!
Also of note: Winnie Fleming is the featured artist for the show. Winnie and I will both be teaching on a cruise next year!
I have patterns by Cindi McCracken, as seen in Keepsake Quilting! Books (autographed) and Kits by Cynthia England! And of course a plethora of Judy Niemeyer patterns!
If you are unable to stop by the show – I hope you are doing what you love!
I love gardening and this name of this quilt just makes me smile. I am working on my own garden wall quilt but am at a stand still waiting for my fabric order so I can sash the blocks (and complete the very last block which I cut the background fabric too short! A photo of my progress is at the bottom of the post.
But first I would like to highlight the progress made by students in this one day class I taught at Pinwheels and Posies a couple of Saturdays ago.
One of the light and one of the darks from KimMm, mm, mmmmmmmScrumtiousLovelyOh so pretty!Linda was already working on her quilt prior to class, in each stack there are 6 blocks. She is making 2 or 3 of these quilts – they are quite addictingI am using an ombre fabric for my background – I think a nice name for this quilt will be Midnight in the Garden or perhaps Moonlit Garden – do you have a suggestion for a name?
And look at this great idea from Laresa
Laresa had a great tip to share with your group. And I love her beautiful smile!
And then just because……
Nothing to do with quilting – but these little red birds love to sing outside my quilt room windows – they are very camera shy though!
Which garden will you be working in today? I hope it makes you smile!
I shared on my Facebook page “HollyDee Quilts” a quilt on my frame and promised photos of the finish. So here they are…
Maria made this Feathered Star in a workshop I taught last year. She wanted her star to float on the background and to have a “winter” look to it. Using mostly “Stonehenge” fabrics really helped us to pull of the look Maria was going for. The original pattern, by Quiltworx, ends at the first pieced border, Maria wanted her quilt a little larger, so she added 2 more borders and took it from 60″ x 60″ to 76″ x 76″
Maria’s Feathered Star -before quiltingQuilting of the feathers – be sure to click on this photo – it is very dark hereQuilting in the setting unitsQuilting on the back, love those square feathers in the outer dark blue borderTexture on the back
And here is what is coming up…….
And what is next on the frame? Susie’s Glacier Star!
I meant to share this on the previous post and forgot….
This was my mom’s and now it calls our house it’s home. We have lived in Houston for 17 years and it took about 14 years for us to find this plants happy spot. Just like my mom, this plant likes to be part of the action, resting in the corner of the kitchen, next to the window to watch the outdoors and next to the kitchen table to reside over meals. Yes it is a happy place!
Where is your happy place? Mine is where the action is!
WOW! – I have been so busy these past few weeks. It will take me a few posts to catch up – but catch up I will do!
Prior to leaving for Montana we had another fun filled Quilt Til You Wilt (Almost 40 hours of sewing over 3 days) at Pinwheels and Posies http://www.pinwheelsandposies.com I taught the Mariners Compass Quilt and had some fabulous students. The class was not full so we also opened it up for previous Mariner’s Compass Students to come work on their quilts. It was so wonderful for those beginning the quilt to see the progress made by previous students. Of course Peggy made sure we were well fed, including those fabulous cakes from “Nothing Bundt Cake”, chocolate covered strawberries and lots of nourishing food
Here are a few photos that you might enjoy…
Several of the students are working on the kit using Judy’s original fabrics from HoffmanMillie’s centerMillie’s quilt is coming along nicelyOh Look Millie almost has a wedgeI love the colors in Sharon’s quiltSari has been working on her quilt for her nieceAnd the last seam is done – oh but wait she now adding the expansion border!Did someone say sustenance!Can’t go wrong with Gio’sYes – a very fun group indeed!
Today Mr. B came to visit while momma helped out a friend. I was working on my “Crackers” (Crackers is a new pattern by Quiltworx.com) quilt and had chosen a quilting design I thought he could help with. After momma left I asked Mr. B if he would like to quilt and he said “sure”. Then he saw that I meant the BIG machine and he was very excited. As I explained the rules he was all “Yes, Ma’am” to every rule – he knew this was a very big deal!
Trying to get the hang of it!Taking extra care guiding the big machineConcentration!
We did a little bit together so he could get the feel of it and I could coach him on speed and then he was able to “quilt” all by himself. I need to remember to add his name to the label!
Look I did that!Yes the needle was actually going up and down while I took pictures!Don’t tell daddy, but I think Mr. B might like thisIn the groove!
He was pretty proud of himself, this lasted about 3 passes and then he was off to play cars, then on to the computer for a little pbskids and some starfall. We also snuck in a game of backgammon, he has only played once before but he remembered part of the setup and he is learning a little bit more each time we play.
For lunch he wanted to make bean and cheese burritos and then have ice cream. After we ate our burritos we headed out to pick some fresh strawberries and blueberries to go with our ice cream.
Now he is coloring and momma is on her way – what a fun diversion for my day.
Tomorrow Little Toot and I will be making gifts for her teachers!