Last Friday we arrived in Memphis. I would be teaching the quilters at Pickin Up the Pieces Quilt Guild on Saturday. We decided to hit Rendezvous for a few ribs and then head over to Beale street. (Ribs photos can be found on Facebook and Instagram!)
I will be back in Memphis at the end of September as the featured teacher for this quilt guild. If you would like more information about this guild or the retreat, please send me a note and I will forward it to their guild!
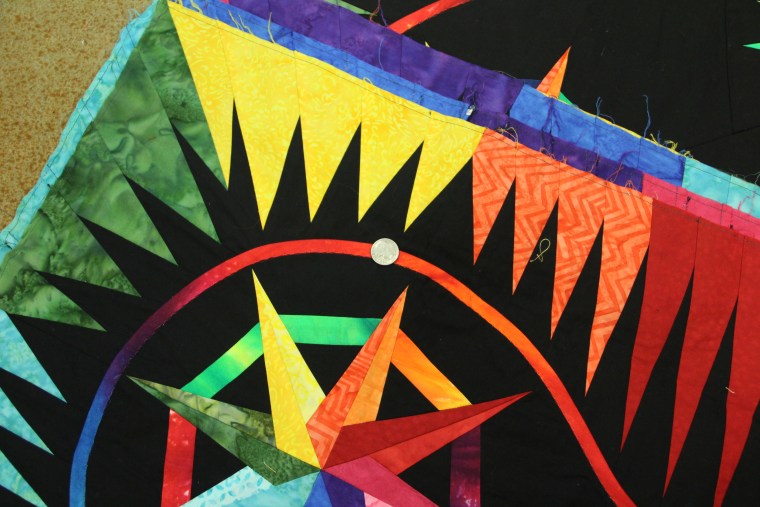
I think if you click on a photo you will get more information about each photo! For all the quilts seen from the workshop I have kits available!

The evening is just beginning and so are the crowds

Now the sun is going down and the sky is beautiful. Some awesome neon on Beale Street

And darkness has arrived, the crowds are getting larger, we will be gone before they get too heavy!

Same facade a little later, accented by street lighting.

A little princess in her carriage.

Michelle finished her leaf! It is quilted, bound and labeled! Class was Saturday all day, this was Tuesday evening.

I love how they have shored up the old facades on Beale Street.

Keeping us all safe while somewhat preserving the original structure. Wonder what will be here next time I make it to Beale Street?

Debby got her leaf together she was so excited to get that far and then Michelle brings a finished quilt!

This new paper piecer was excited to finish the B side and add the vein!

I love how the purple turned out! PRE-CUT kits are available for this!

Another purple one!

5 of the nine students!

Hubby had the camera while I was presenting my lecture – he snapped some random shots so I will share. Here I was talking about how much fun we had on the cruise – this was our cruise project, PRE-CUT kits are still available for this quilt!

A small guild, but boy are the productive members of their community! On this evening they were filling a grocery cart full of groceries for the church food pantry. The number of projects this small and might group takes on for their local community was amazing. The guild is 17 years and many charities have benefited from their kindness and generosity!

I think hubby is partial to this quilt (I just happened to be in the photo!)

Actually I was jumping down off the riser to I could better point out how I used an ombre fabric for my sashing as well as how the JN Bali Pops are pre-sorted light to dark to get that wonderful dark (upper left) to very light (lower right). And of course we have a silhouette of Little Toot in charcoal silk!
I hope you enjoy this sneak peak into the life of a Judy Niemeyer Certified Instructor. We get to meet so many amazing quilters and along the way make some great friends!
Dee